Introduction
This semester, we will take inspiration from the strategy game of Battleship!
This exercise is meant to be the first step to building the full game. You will prompt Player 1 to input a secret number between 1 and 4. Then, you will prompt Player 2 to guess the secret number. Then you will tell Player 2 whether or not they guessed correctly (aka whether it was a hit or a miss) using colored boxes. For both player inputs, you will also notify the user if they input a number out of range.
You can follow the steps below for implementing the program one step at a time. To get a sense of where you are going, though, consider what we expect the output to be given some example inputs:
Background Lesson: Emoji
In this exercise you will need to make use of an advanced string concepts: emoji! 🤠
Before beginning work on this exercise, read the following lesson and complete the related questions on Gradescope: Unicode, Emoji, Escape Sequences, and f-Strings
Part 0. Setting up the Python Program - 10 points
In Visual Studio Code, be sure your workspace is open. (Reminder: File > Open Recent > comp110-YYS-workspace is a quick way to reopen it! Where YY is the current year and S is the semeseter: S for Spring, F for Fall.)
Open the Explorer pane (click the icon with two sheets of paper or to to View > Explorer) and expand the Workspace directory.
Right click in your workspace directory and select “New File”. Enter the following filename, being careful to match capitalization and punctuation:
ex01_simple_battleship.py
Before beginning work on the program, you should add a docstring to the top of your Python module just as you did in EX00. Then, you should add a line with the special variable named __author__ assigned to be a string with your 9-digit student PID. (Disclaimer: Out in the real world the __author__ variable is typically your name and e-mail address, but since we will grade your programs we’d like to avoid potential bias in seeing your names as part of the programs as we’re grading.) Add the following lines above the line of code that calls the print function. Fill in your 9-digit UNC PID number, without any spaces or dashes, in the __author__ string.
    """EX01 - Simple Battleship - A cute step toward Battleship."""

    __author__ = "1234567890"
Part 1. Prompting for Player 1 Input - 15 points
Using the concepts you learned about User Input and Variables, you will want to ask the first user to “Pick a secret boat location between 1 and 4:”, storing their input it as an int variable. Please choose meaningful, descriptive names for your variables.
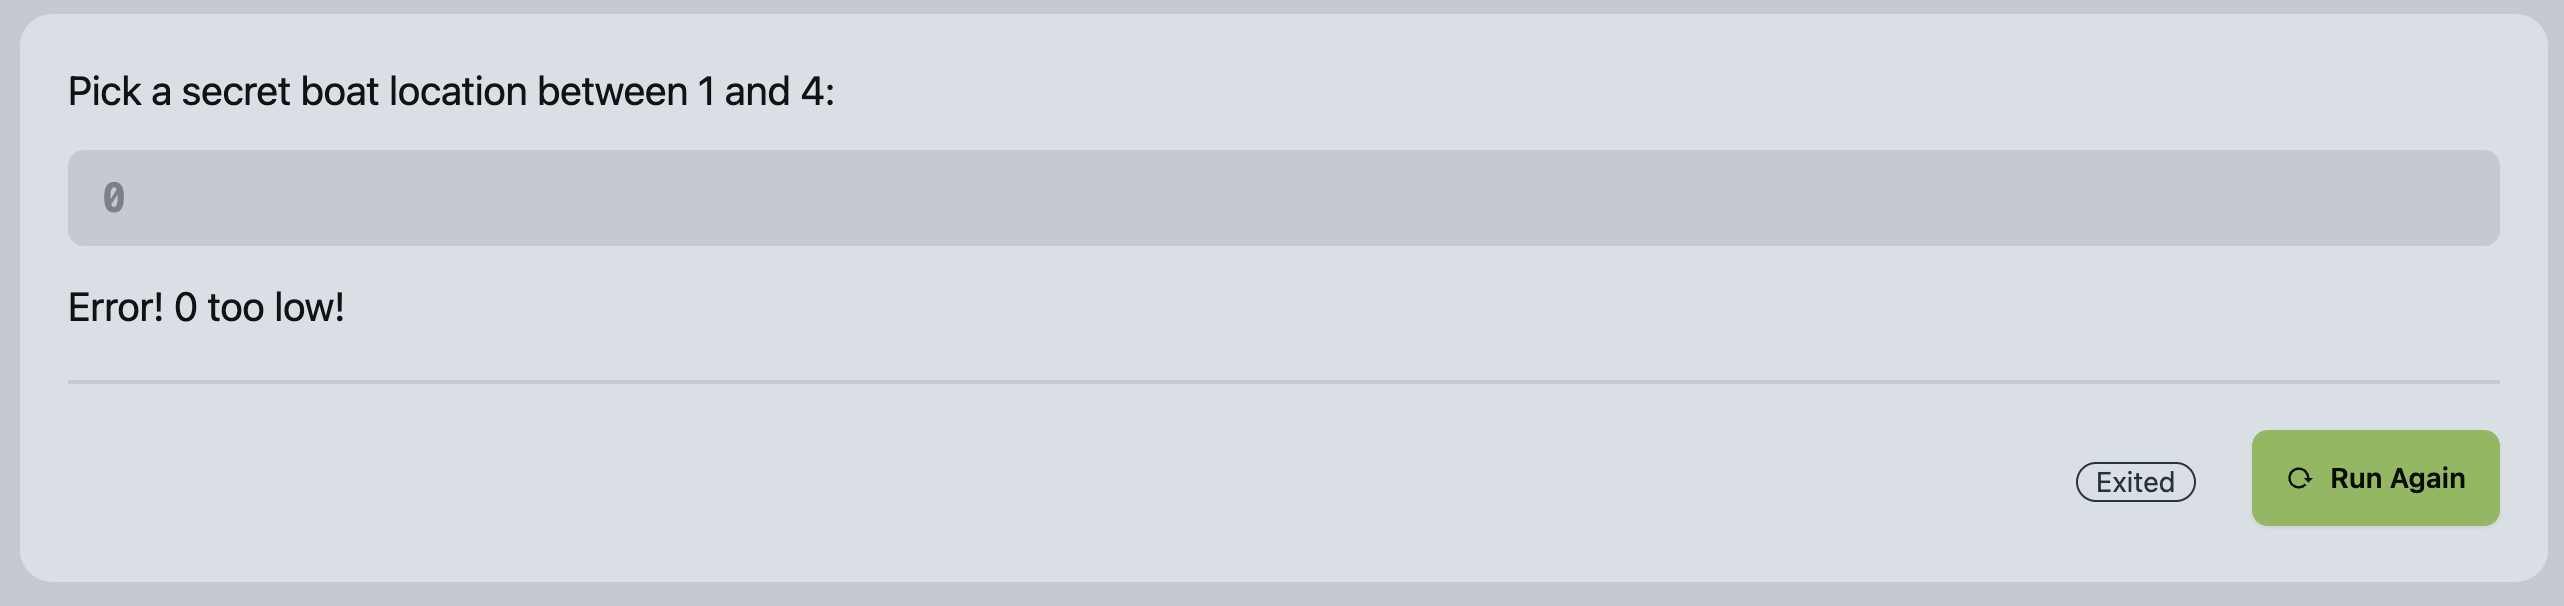
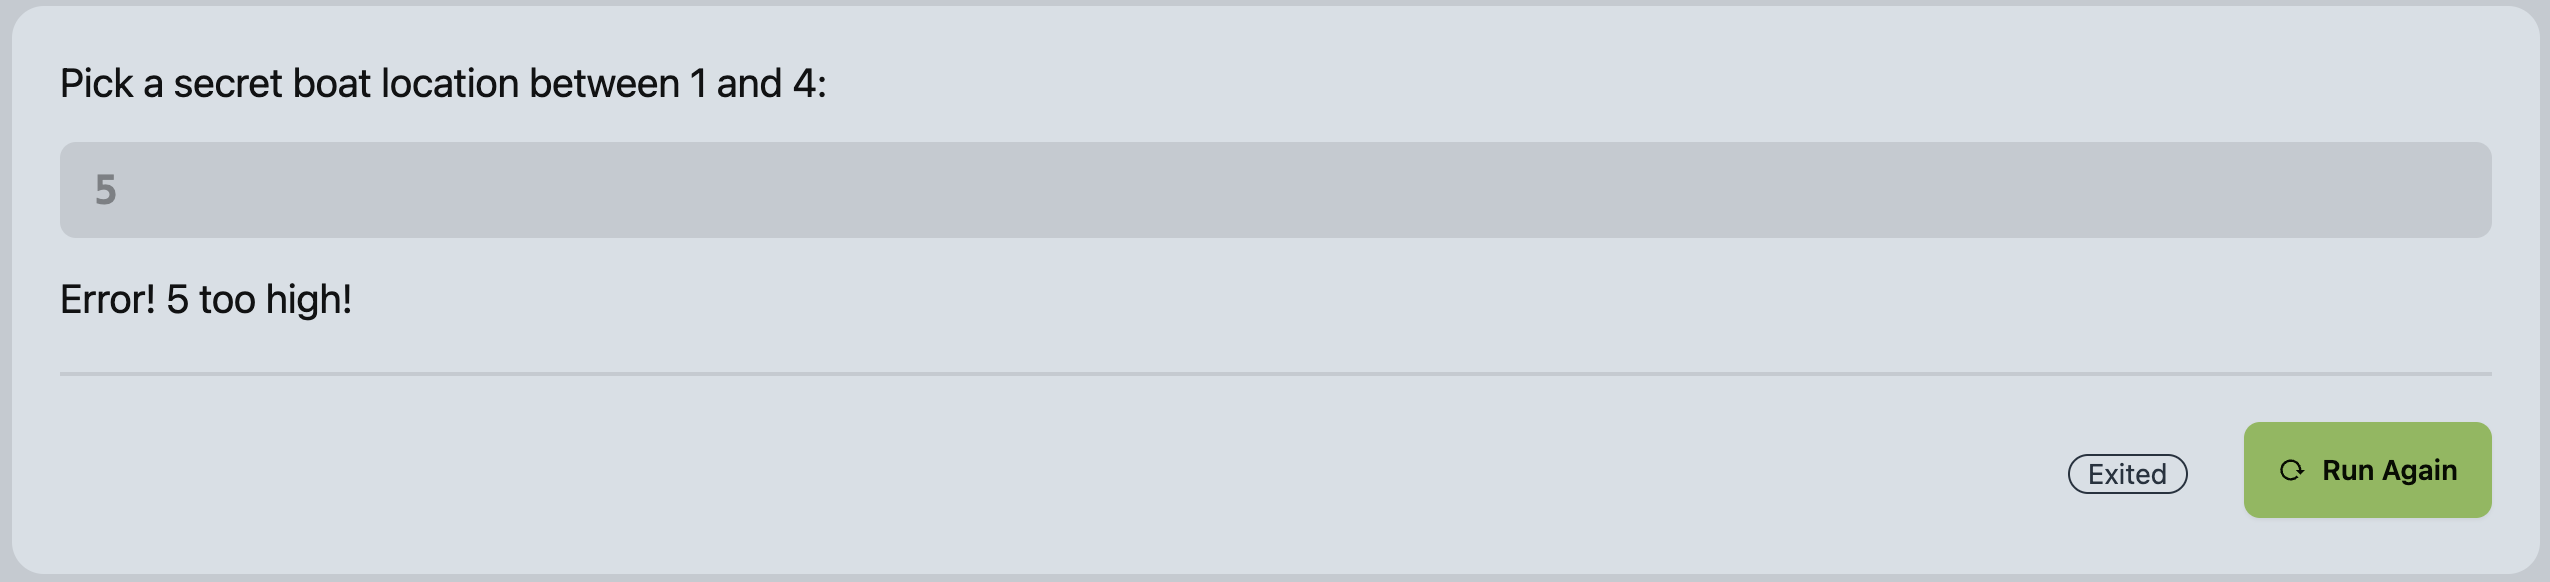
If they give a valid input between 1 and 4, the program should exit and print nothing. However, if their input is too low or too high, it should print an error message. Write your prompts and diagnostic message such that you can reproduce the following in the shell after saving and running your program:
Example of too low an input:
Example of too high an input:
(Hint: f-strings are useful for creating these outputs!)
WARNING: Autograding will very specifically be looking for exactly the format of lines output shown above. When you run the program on your machine with the same inputs as above, your printed results should match exactly.
Part 2. Prompting for Player 2 Input - 15 points
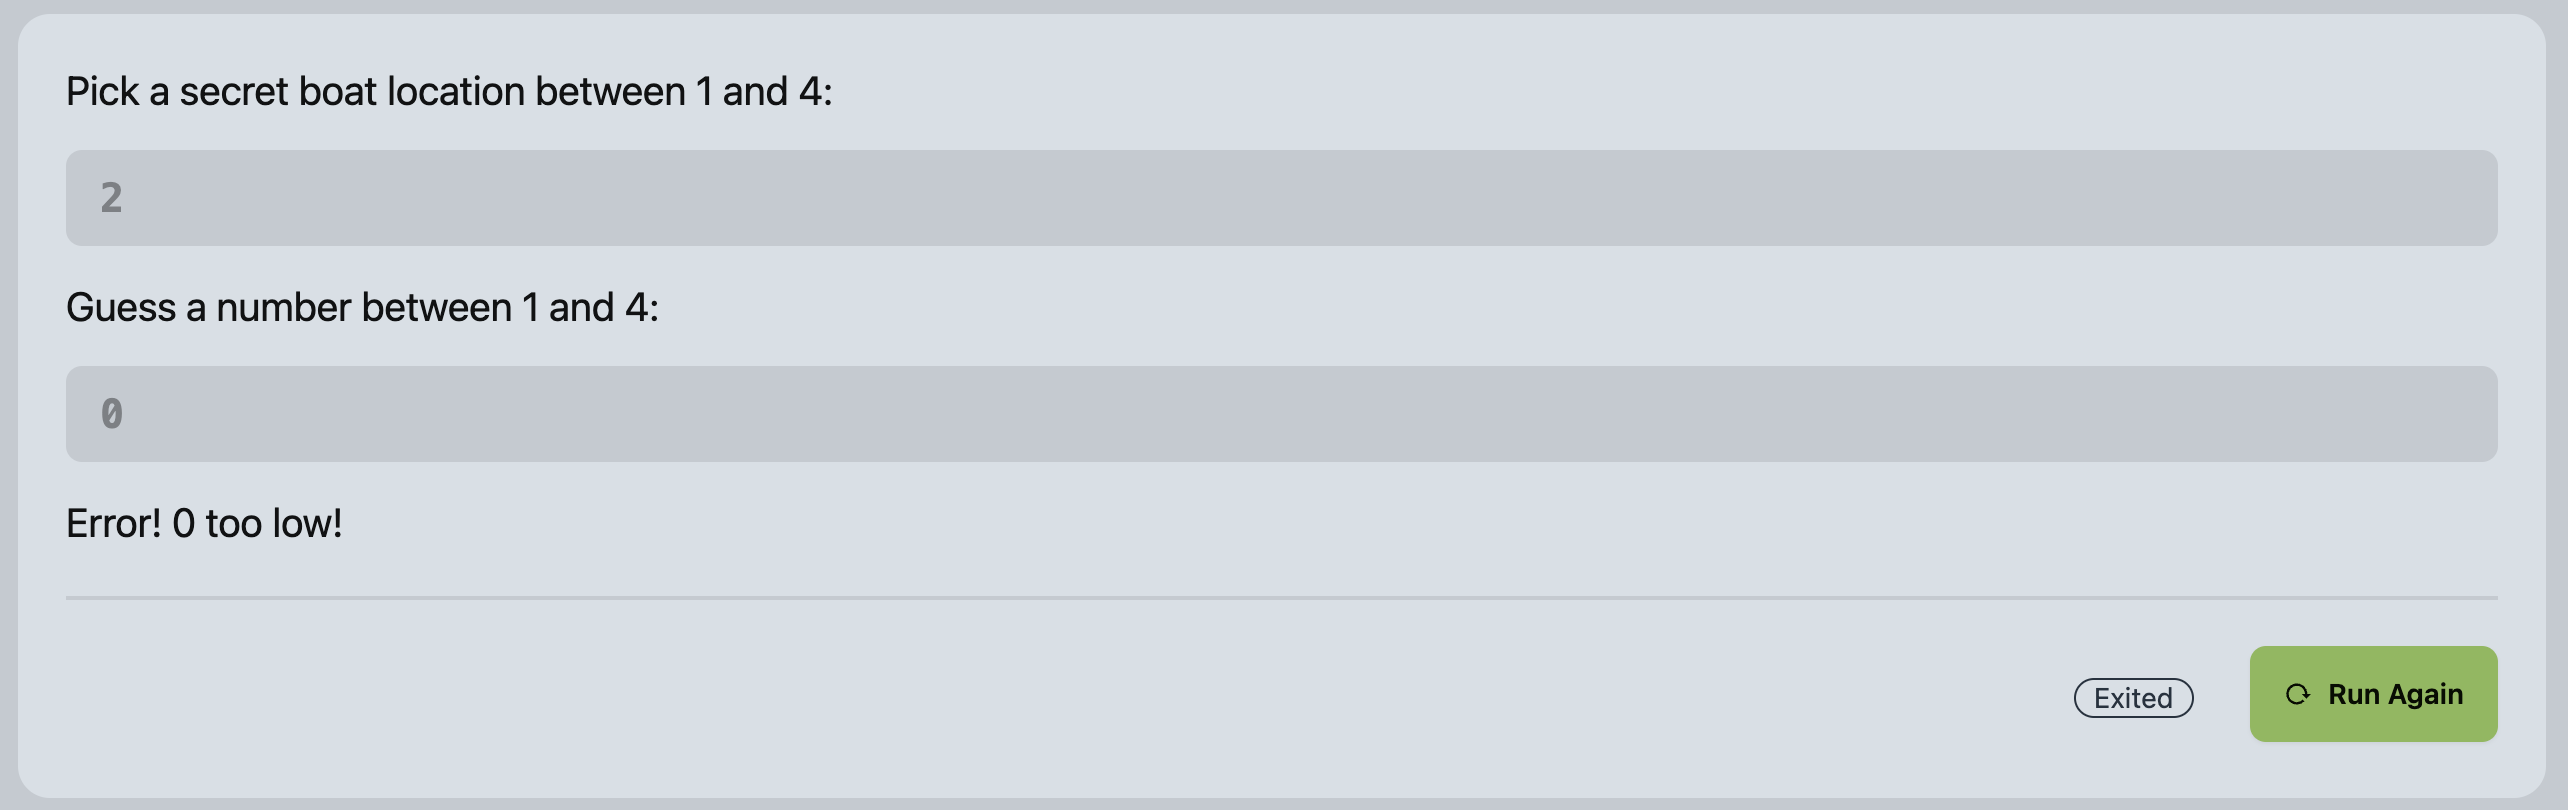
Now, you will do the same to prompt the second user for input with “Guess a number between 1 and 4:” and store that under a different variable name. (Imagine Player 1 input their boat location and then passed the computer to Player 2.)
If they give a valid input between 1 and 4, the program should exit and print nothing. However, if their input is too low or too high, it should print an error message. Write your prompts and diagnostic message such that you can reproduce the following in the shell after saving and running your program:
WARNING: Autograding will very specifically be looking for exactly the format of lines output shown above. When you run the program on your machine with the same inputs as above, your printed results should match exactly.
Part 3. Checking User Input for Match - 20 points
Now that you have gathered your inputs from Part 1 and Part 2 and stored them as variables, your task is to check if Player 2’s guess is equal to to the box where the ship is hidden. These checks will involve combining concepts you’ve learned in recent lessons:
- Expressions
- Relational Operators - Equality
- Conditional if-else Statements
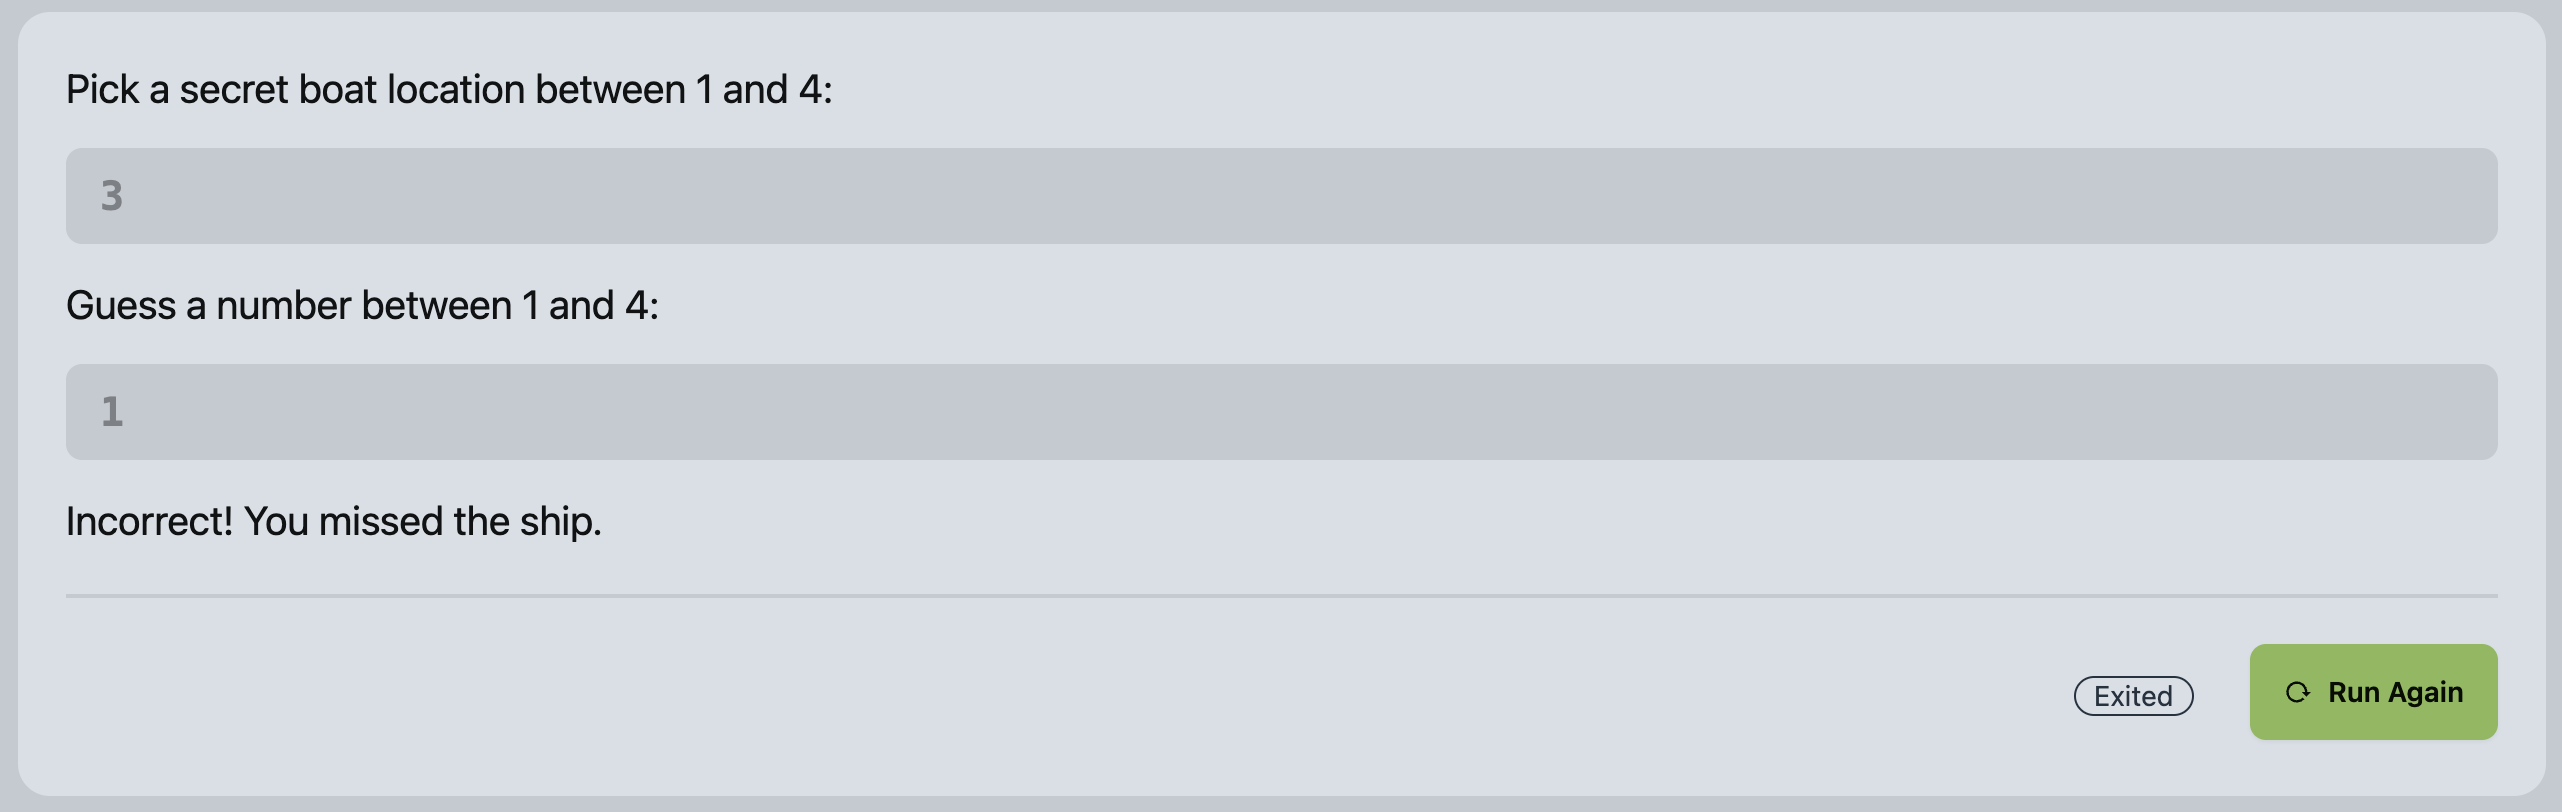
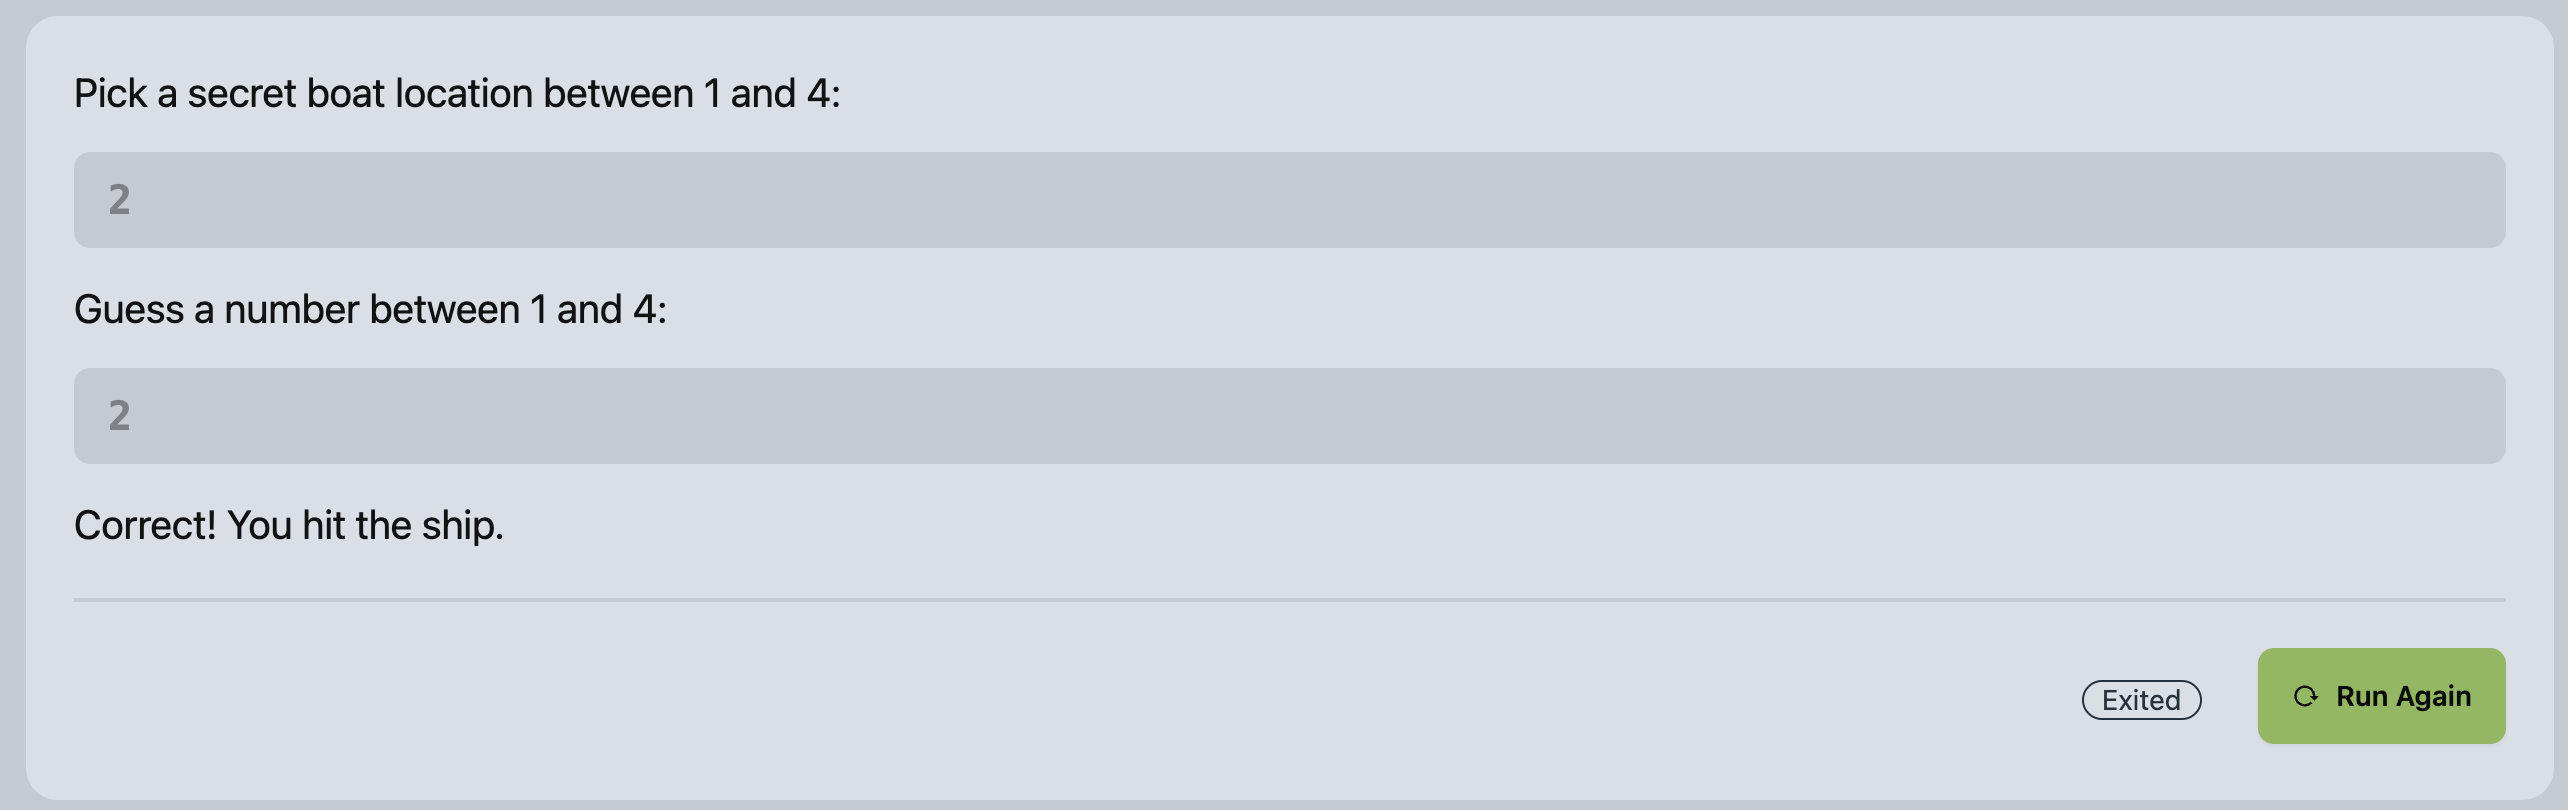
You’ll have to translate the following English logic into Python: If the user’s input is equal to the secret number, then you should print out a message indicating that the user correctly hit the ship. Else, you should print out a statement that they missed the ship.
Your goal in this part is to be able to do the following:
Incorrect Guess:
Correct Guess:
Part 4. Printing A String of Boxes - 20 points
Now, let’s bring a visual aid to the game! You will need to build up a string of emojis using concatenation to show where the user hit or missed a boat. You can use the following named constants in your program to simplify your implementation. We will learn more about named constants soon, but for now know they are simply variables whose values you will not change later in your program and make your programs easier to read:
    BLUE_BOX: str = "\U0001F7E6"
    RED_BOX: str = "\U0001F7E5"
    WHITE_BOX: str = "\U00002B1C"
Next, create a str result variable and modify your current if and else statements in the following way:
If Player 2’s guess matches Player 1’s secret number, set result variable to a red box. Else, set the result variable to a white box.
Now, you need to start building your full string of emoji boxes by establishing another str variable to store it in and initializing that to an empty string. Essentially, the default box should be blue, unless its the box position that the user correctly or incorrectly guessed (red or white, respectively). In the future, you will use loops to make this process more efficient, but for now, you will need a series of if statements to check each possible option. Here’s an example for the first one:
If Player 2’s guess equals 1, concatenate the guess box to the resulting emoji string of boxes. Else, contatenate the blue box.
The logic is similar for all other possible box numbers. After checking for each posible box, print the resulting emoji string of boxes.
Your result should resemble the demo from the beginning of this writeup:
Part 5. Exiting Early for Invalid Inputs - 10 points
Now that you’ve added more functionality to your program in Parts 3 and 4, see what happens when you go back to Parts 1 and 2. If Player 1 inputs an invalid value, what happens? How about when Player 2 inputs an invalid value? You’ll notice that you no longer get your expected outputs from Parts 1 and 2. Instead, the program keeps running and doesn’t exit immediately.
It’s good practice to handle bad input from an end-user gracefully in your programs. Our strategy, for now, will be to simply print an error message and then exit the program early. There is a special built-in function called exit() that will send a signal to your system and tell the program to quit at that point, not continuing on further in the program. Before implementing the function in your program, think about when and where it logically makes sense to quit.
Once you make these changes, you should get the expected outputs from Parts 1 and 2 again, while still getting the correct functionality added in Parts 3 and 4.
Part 6. Type Safety and Linting - 10 points
The autograder uses industry standard tools for checking the type safety of your programs (e.g. being sure you’re using variables of the correct data types in valid ways) and linting style rules. If you have point deductions on Type Safety or Linting, read through the feedback the autograder gives and it should direct you to the line number in your program with the issue.
Part 7. Hand Grading
Part of this assignment will be hand graded to make sure you only use concepts within the course.
We expect you to implement this exercise using only the concepts covered in COMP110. If you have prior programming experience, restrict your implementation to only the concepts covered. While there are many ways to implement this program with additional concepts beyond those we have covered, you should not attempt to do so until after submitting this exercise for full credit once the autograder is posted. Gaining additional practice with the fundamentals may feel clunky, but will help ensure you have full command over the concepts we expect you to know. Additionally, it is good practice for working in other programming environments which are more constrained and require creativity to overcome restrictions. For this exercise, you will be penalized for using any kind of loop construct.
Rubric
- Part 0. Setting up the Python Program - 5 points
- Part 1. Prompting for Player 1 Input - 15 points
- Part 2. Prompting for Player 2 Input - 10 points
- Part 3. Checking User Input for Match - 20 points
- Part 4. Printing A String of Boxes - 20 points
- Part 5. Exiting Early for Invalid Inputs - 10 points
- Part 6. Type Safety and Linting - 10 points
4. Make a Backup Checkpoint “Commit”
Now you can commit your new work to Github! This will back up your work online!
- Open the Source Control panel (Command Palette: “Show SCM” or click the icon with three circles and lines on the activity panel).
- Notice the files listed under Changes. These are files you’ve made modifications to since your last backup.
- Move your mouse’s cursor over the word Changes and notice the + symbol that appears. Click that plus symbol to add all changes to the next backup. You will now see the files listed under “Staged Changes”.
- If you do not want to backup all changed files, you can select them individually. For this course you’re encouraged to back everything up.
- In the Message box, give a brief description of what you’ve changed and are backing up. This will help you find a specific backup (called a “commit”) if needed. In this case a message such as, “Finished Exercise 00!” will suffice.
- Press the Check icon to make a Commit (a version) of your work.
- Open the View menu and select Command Palette, the shortcut for this menu is:
- Windows:
Control+Shift+P - Mac:
Command+Shift+P
- Windows:
- Begin typing in:
Git: Push to...and pressEnteronce it is the first option. - Select the
backupremote that is your personal workspace on GitHub. If you do not seebackuplisted, see the instructions below on Setup Backup Course Material Repository.- You may see a spinning “refresh” icon in your status bar at the bottom of VSCode. Unless an error backing up occurs, you will not see any confirmation.
To see your commit on Github, in a web browser, navigate to https://github.com/comp110-24ss1/comp110-workspace-USERNAME and substitute USERNAME with your GitHub username. Open the comp110 directory and ex00_hello_world.py you’ll see the work you just completed backed up to GitHub. Notice above the file’s content’s you’ll see your commit message.
Submit to Gradescope for Grading
All that’s left now is to hand-in your work on Gradescope for grading!
Login to Gradescope and select the assignment named “EX01 - Simple Battleship”. You’ll see an area to upload a zip file. To produce a zip file for autograding, return back to Visual Studio Code.
If you do not see a Terminal at the bottom of your screen, open the Command Palette and search for “View: Toggle Integrated Terminal”.
Type the following command (all on a single line):
python -m tools.submission ex01_simple_battleship.py
In the file explorer pane, look to find the zip file named “yy.mm.dd-hh.mm-exercises-ex01_simple_battleship.py.zip”. The “yy”, “mm”, “dd”, and so on, are timestamps with the current year, month, day, hour, minute. Upload this file to Gradescope to submit your work for this exercise.
Autograding will take a few moments to complete. If there are issues reported, you are encouraged to try and resolve them and resubmit. If for any reason you aren’t receiving full credit and aren’t sure what to try next, come give us a visit in office hours!